The ins and outs of Angular-*ngFor!
14 Feb, 2021Welcome to my second publication of “The ins and outs of Angular” where I deep dive into Angular’s codebase to learn and show what Angular is doing for us behind the scenes that make Angular so great. Today is all about *ngFor, one of the most common directives used.
The Angular definition: “ A [structural directive] that renders a template for each item in a collection. The directive is placed on an element, which becomes the parent of the cloned templates.” In simple terms, the directives take an array of any ( objects, numbers, and even nulls) and render the template given for each iteration. If we give an array of 5 items (array.length == = 5 ) the ngFor directive will render 5 HTML elements which will be parented by an ng-container.
The deep dive into ngFor starts with a setter, which is an Input of NgForOf
(ngFor is a shorthand that in compilation turns into NgForOf). It receives data
of type NgIterable, Which means that it can receive any object that is iterable
(remember, arrays are a unique type of object).
An example of such unique
Iterable can be a
NodeList
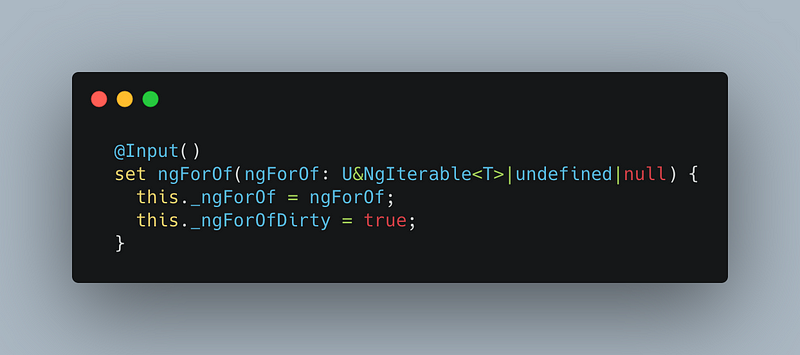
The entry point of ngFor
Angular uses the benefits of its own life cycles to update the DOM. It uses “ngDoCheck” which is another (yet rare) life cycle event.
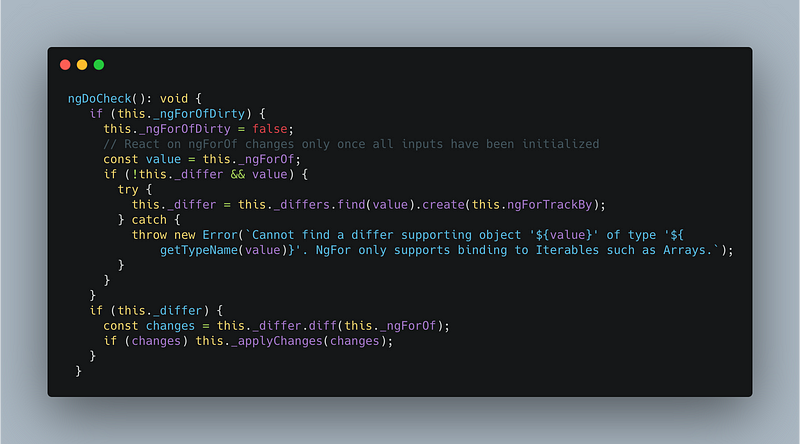
ngFor’s ngDoCheck lifecycle function
DoCheck is a lifecycle class that has been created for directives, its job is to
notify the directive of a change detection event that occurred (The black magic
of them all ). when ngDoCheck is invoked it checks that :
1. There is a
value to iterate from.
2. Checks that there is some difference from the
previous state (to cut down on un-required DOM manipulations.
3. Get the
changes of the updated data object from the previous data object.
If all of the checkboxes on the list before are true, it will finally invoke the _applyChanages function, which receives the difference of the iterable data and will start updating the DOM.
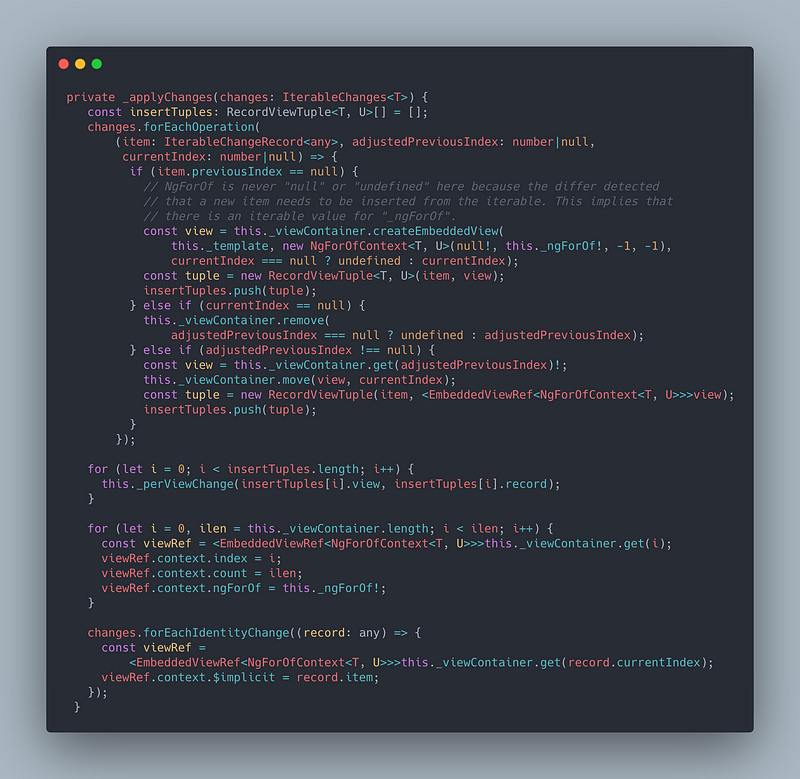
Iteration over changes and update the DOM
In _applyChanges, it will iterate over each of the changes. each iteration will
have 3 parameters injected into it.
1. record: the data that will be the DOM
will render/re-render.
2. previousIndex: The previous index in the DOM
container ( can be null if new ).
3. currentIndex: The current index in the
DOM container (Can be null if removed).
The function _applyChanges is pretty
complex so I will use a diagram to explain the flow.
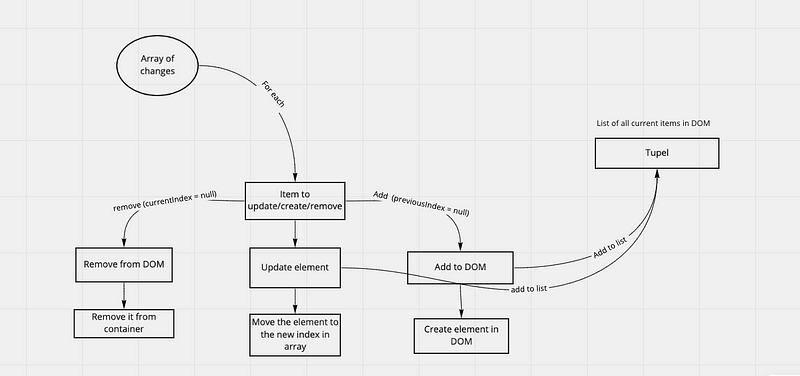
How ngFor builds the list of items in the DOM
After we have built our Tupel list which contains all the items in our DOM we need to insert the data into it. for this, we iterate over the list of items in the Tupel and insert the data in each row’s context.

Adding the data of the index into the implicit of that iteration but does not put it into the DOM yet
There is one more iteration to through, which is finally embedding or data into the DOM.
 Rendering the updated data into the DOM one by one
By the number of iterations we have done it seems like performance should be bad, we have multiple iterations on a lot of the data in different forms. Angular did a lot of work to keep our code and itself safe from bad practices. there is a cost to it but in very large lists there two solutions to fix this. the first can be using a virtual scroller with angular/CDK (link). Or use the “*trackBy” *option that provides.
TrackBy is a function that takes each item and its index and creates a hash-map
to make the tracking algorithm better for your app/web-apps needs
An example
of the Trackby:
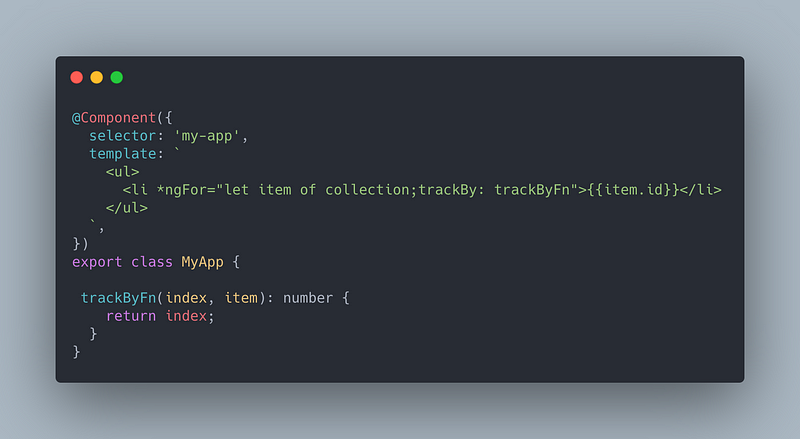
an example of trackBy
Summary:
NgFor is a complex directive that has user experience in mind first, not
rendering everything from the start each time, iterating over the same arrays
multiple times, all this to protect our UI from breaking and giving a more
seamless experience to our users.
ngFor a lot uses unique classes to give it
a more “clean” view of code where a lot of the “hard” work is done inside those
classes (IterableDiffers, IterableChangeRecord, *NgForOfContext). *The code
seems very slick and small but as I feel we know, that usually means there is a
lot more hiding under the hood.
This is as deep as I will go in this article on how ngFor works. Hope this was helpful and feel free to comment to contact


